Build a Model River – Click here
Using a plastic container filled with soil or sand, carve out a river channel through the material. Populate the river catchment by adding vegetation, toy houses and sediment like boulders and pebbles. Think carefully about what size and shape of sediment would be found throughout the course of the model river. Use a watering can and water to simulate rain falling and observe what happens. You can compare this as you increase the volume of rainfall, or change the buildings and vegetation placed around the model catchment.
Permeable and Impermeable Surfaces Experiment – Click here
Ask students to record all the surfaces they can see around the school grounds (wooden benches, grass fields, tarmac playground, sand pit etc.) Encourage them to think about how permeable each surface is. Using beakers, filter paper and a mixture of materials like gravel, sand, silt, soil, large rocks, and clay, fill each filter paper with some of the material. Pour water through the filter paper and record the time taken to permeate through the filter and into the beaker.
Water infiltration experiment – Click here
This experiment shows how water is filtered and cleaned through the environment. Using filter paper, a water bottle, natural materials, and water, pour dirty water (soil and water) through the water bottle which is layered with sand, grass, pebbles and a water filter and observe how the colour of the water changes after it has passed through the filtration layers.
My local river project – Click here
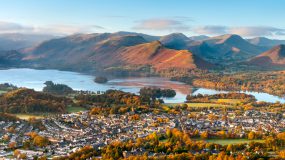
Find your location on a map and locate your closest river. Record its name, path and shape on the worksheet. You could expand this by visiting the river and recording your thoughts.
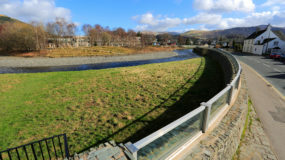
River fieldwork in an urban area – Click here
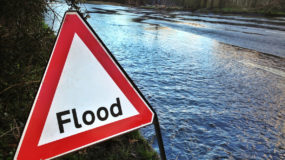
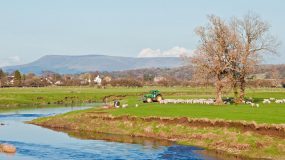
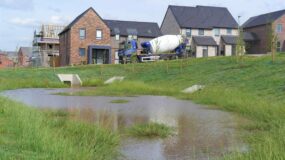
Using the UK river atlas from ESRI, find a river local to the school grounds and record the width, length and average discharge of the river. Investigate any historical flood events in this area and create a questionnaire to ask local people about flood risk and flood risk management processes. Upon visiting the river location, choose several transects along the course and record the findings of flow, discharge, sediment size and any flood defences you might see.
Make a cloud experiment – Click here
Clouds form when warm moist air is cooled and condenses. Using ice, warm water, a glass and a metal dish, pour warm water into the glass and cool the metal dish down with the ice cubes. When you sit the cold dish on top of the glass, a cloud will form near the top of the glass.
Dam building exercise – Click here
Finding a small stream or flowing surface water, use items like mud, sticks and stones to divert, slow, or hold the water back. This could also be done on a model river. If you are choosing to do this on a small stream, ensure you remove any structures afterwards to avoid causing harm to the natural flow.
Water Wheel Investigation – Click here
This activity introduces hydropower as a source of renewable energy. Make your own water wheel using items like paper plates, cups, dowels and a plastic tub and steadily pour water into one of the cups and watch the wheel turn and water flow. Assess how the speed and amount of flow affects the speed of the wheel turning.
Reduce, Reuse, Recycle Relay – Click here
This relay race game, which could be played in a PE lesson, involves teams working against each other to categorise the action cards into reduce, reuse and recycle. Pupils take it in turns in their teams to race out and place their action card in the right category location.
Climate Change Dodgeball – Click here
A game which involves groups of pupils representing the Earth and a second group representing greenhouse gas emissions. Choose one pupil to represent the sun who throws ‘rays’ (beanbags) to the pupils representing the Earth. The Earth pupils should repel the rays back out of the atmosphere and the greenhouse gas pupils should aim to block them and trap them inside the Earths’ atmosphere. This game can be developed by increasing the number of greenhouse gas pupils, showing how an increase in greenhouse gases is trapping more heat (beanbags) in the atmosphere leading to climate change.
Urban Heat Island / Greenhouse Gas Experiment – Click here
Using a lidded glass jar and 2 thermometers, place a piece of black paper and a thermometer in the jar and seal it up. Place the jar in sunlight and place the second thermometer on a piece of black paper next to the jar. Record the difference in temperatures recorded between the two thermometers. To further this experiment, switch the black paper for white paper and record the findings to assess the urban heat island effect.
Flooding Mucky Dip Game – Click here
Flooding Mucky Dip helps young people to learn about some of the risks associated with flooding and actions they can take to prepare. Pupils take it in turns to pull out laminated risk cards from tubs of murky water (coffee / dye / sand) and explain what the risk is.
Create your own mini wetland – Click here
Create Your Own Mini Wetland guide. Mini wetlands are tiny habitats that make a big difference. You can create your own barrel pond, drainpipe wetland or bog garden which is great for children to explore this environment and the wildlife and plants which call this habitat home.
Make your own mini water butt – Click here
An experiment suitable for young children which involves making their own water butt which they can use to collect rainwater to reuse in the garden.
Ask pupils to collect items like containers, cartons, bottles or tubs which can be reused and turned into planters which can grow seeds.
Predicting weather – Click here
Long before the weather forecast could be easily accessed online, the TV or radio, clues in our natural environment were used as a way of predicting the coming weather. Using observations like pinecones being closed or open, trees leaves curling up, and how animals travel and rest, see what you can spot and make a prediction on what weather we might have.
Windy days DIY activity – Click here
Using the windmill template (Met Office education windmill template) place your windmill in a variety of different locations around your home or school. Use a stopwatch to record the number of rotations your windmill has in a 60sec period. Monitor this over a few days to gain the average for the week.
Make your own weather station – Click here
This Met Office pack contains instructions you can use to make your own rain gauge, wind vane and thermometer box. Create them all and then place them in your garden or school grounds and record the weather observations daily over the course of a week.
Create your own cloud spotting googles and spend some time outside looking into the sky for clouds. There is a cloud identifying worksheet which you can use to record which types of clouds you’ve found.